People are always asking questions about these wonderfully frighting pumpkins so I thought I would share some trade secrets so that you can construct your own. These pumpkins have been to h*ll and back and have the scars to show for it. I was inspired by the pumpkin ideas from the Stolloween site. If you have never checked this site out, go now! He has the most AMAZING pumpkins and Halloween props around. This site also has recipes for paper mache and paper clay.
This is the recipe I use for my paper mache.
1. Mix the dry ingredients.
2. Mix in the cool water with a fork or whisk, adding the water a little at a time to keep it as smooth as possible.
3. Stir the flour mixture into the boiling water.
4. Allow it to boil for two or three minutes.
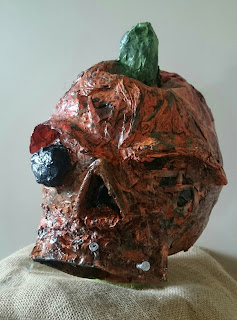
 Once you are satisfied with the way your pumpkin looks they are ready for painting. I used a mix of red, light orange and dark orange, then I antiques with black paint.
Wait till dry and seal with outdoor sealer.
This is the recipe I use for my paper mache.
- 1/3 cup flour
- 2 tbsp rice flour
- 2 tsp salt
- 1 tsp baking soda
- 2 cups boiling water
- 1 cup cool water
1. Mix the dry ingredients.
2. Mix in the cool water with a fork or whisk, adding the water a little at a time to keep it as smooth as possible.
3. Stir the flour mixture into the boiling water.
4. Allow it to boil for two or three minutes.
This can be stored in the fridge for a few days, just stir it up and you are ready to use it again.
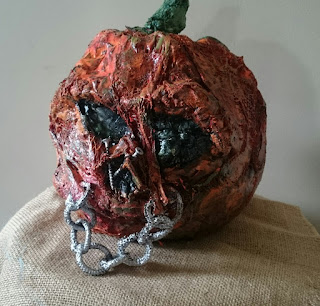
These are the tortured pumpkins I have done over the past few years.

 and I also added embedded drywall screws into their structures - you can use anything, this is just what I had laying around.
I find this to be the most creamy, non clumping recipe I have ever used.
These are the tortured pumpkins I have done over the past few years.

Special features and how they were created:
These hellish pumpkins have been outfitted with an outer dressing of cheesecloth and/or Kleenex over the paper strip layer- for the effect of peeling and wrinkled layers of skin,
they also have chains binding their - these are formed by cutting lengths of pipe cleaner, forming them into links and attaching them into the paper mache
 and I also added embedded drywall screws into their structures - you can use anything, this is just what I had laying around.
Also if you look really close you will be able to see "foam strip" stitches that have been embedded in one of the skulls of the pumpkin - for these i just cut small strips of fun foam, crossed them and embedded them in the layers of mache. These will not be going anywhere.
 Once you are satisfied with the way your pumpkin looks they are ready for painting. I used a mix of red, light orange and dark orange, then I antiques with black paint.
Wait till dry and seal with outdoor sealer.
To antique an item is to water down the black or brown paint. Apply and rub off. This will settle the dark color into the crevices, highlighting the details.
Comments
Post a Comment