If you love scrapbooking, paper arts or mono printing you will love gelatin plate printing. These plates are available through your local craft store or online but I have chosen to make my own using this recipe:

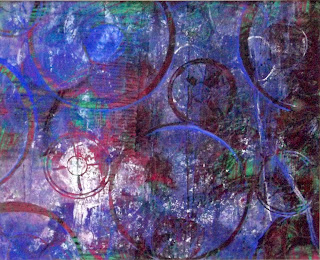

 These pretty papers were created using a homemade permanent gelatin plate (youtube has a few videos and recipes for these) but you can also purchase a ready-made Gell Printing Plate from Amazon or local crafting stores. These prints can be used in so many ways, from creating cards and tags to backgrounds in art journals or mixed media pieces, and because you are in essence mono-printing no 2 papers will ever look the same. These were created using hand cut stencils/stamps and basic craft paint. I have also used Golden Open's for some experiments and on hot dry days, I have also added Debbie Travis glazing liquid (just what was on sale) to extend the working time of the basic craft paint. These are a few that turned out so well that they are now mounted and hung independently.


Ingredients:
Recipe 1
6 T of unflavored gelatin (7 of the small packs)
1 1/2 cups boiling water
1 1/2 cups glycerin
1 1/2 cups glycerin
2 bottles of rubbing alcohol (some people have not had any luck with this ingredient but I have found it works for me) also please do not microwave rubbing alcohol it may cause explosion or burns.
or you can use this recipe
Recipe 2
4 oz. unflavored gelatin (4 boxes or 16 packets)
2 – 6 oz bottles of glycerin
1/2 cup COLD WATER
1 1/2 cups boiling water
2 – 6 oz bottles of glycerin
1/2 cup COLD WATER
1 1/2 cups boiling water
Equipment:
You can use a rectangular glass pan, one of those clear acrylic frames, or a metal pan or tray. You can also make plates in round shapes or cut fresh ones into geometric shapes or organic forms. If the pan is 9×13, the plate will come out about 1/4 inch thick. Adjust the recipe for larger or smaller sizes or thicker results. Thicker plates are less likely to tear.
Recipe:
First, mix the gelatin and glycerin together thoroughly in a heat-safe container, then added boiling water and stir slowly. Try not to introduce air into the mix. Alternative: Start with the cold water and 1 bottle of glycerin; stir gently and add glycerin; stir thoroughly and add hot water; stir gently and add remaining glycerin.
Pour the hot melted mixture into a pan — make sure first that everything is level in your setup. Skim the top with a strip of newspaper to remove air bubbles. Let it set. You can also refrigerate the mix until set (a few hours) or put in the freezer for 15-20 minutes. Or just leave it on the counter to cure, since it’s best not to move it until it’s firmer.
To remove the plate from the pan, use your fingers to go around working the gel back from from the edges. After you break that seal, you should be able to peel it from the pan and move it onto a plexiglas plate or whatever you will use as a printing surface. Note: a clear surface lets you place designs underneath to work with — or a paper so that you can gauge pulling prints better.
After curing, if your result is still a little sticky or malformed, you can microwave it (in a glass container) for 3-4 minutes to liquify it, stir it when needed. Then pour it, and let it set again. Sometimes it needs more or less water. The paint should roll on smoothly, although the very first paint application may not be smooth. You can also redo the melting and resetting if it tears (or just cut it down).
Now that you have your own plate, let the fun begin. Get out your mark makers, stamps, stencils and paint and start layering and pulling. Remember not to waste those ghost images from your firt pull. Those sometimes make the best backgrounds.
Now that you have your own plate, let the fun begin. Get out your mark makers, stamps, stencils and paint and start layering and pulling. Remember not to waste those ghost images from your firt pull. Those sometimes make the best backgrounds.


Comments
Post a Comment